Kia Soul EV: Driveshaft Assembly / Front Driveshaft Repair procedures
Kia Soul EV (PS EV) 2015-2020 Service Manual / Driveshaft and axle / Driveshaft Assembly / Front Driveshaft Repair procedures
| Replacement |
| 1. |
Loosen the wheel nuts slightly.
Raise the vehicle, and make sure it is securely supported. |
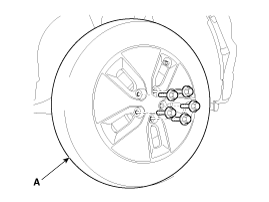
| 2. |
Remove the front wheel and tire (A) from front hub.
|

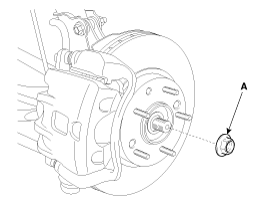
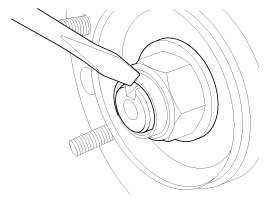
| 3. |
Remove the driveshaft coking nut (A).
|
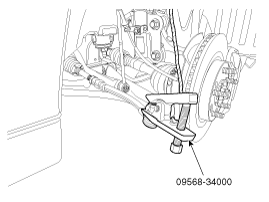
| 4. |
Remove the tie rod end ball joint (C) from the knuckle by using the SST (09568-34000).
|
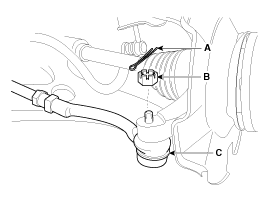
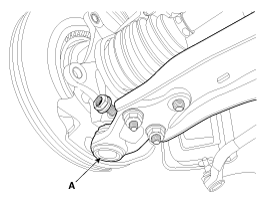
| 5. |
Remove the lower arm (A) from the knuckle.
|
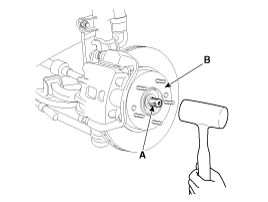
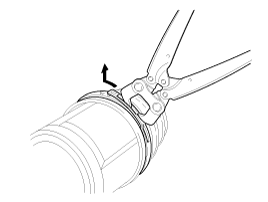
| 6. |
Using a plastic hammer, disconnect driveshaft (A) from the axle hub (B).
|
| 7. |
Insert a pry bar (A) between the transaxle case and joint case, and separate the drive shaft (B) from the transaxle case.
|

| 8. |
Install in the reverse order of removal. |
| 9. |
Check the front alignment.
(Refer to Suspension System - "Front Alignment") |
| Inspection |
| 1. |
Check the driveshaft boots for damage and deterioration. |
| 2. |
Check the ball joint for wear and damage. |
| 3. |
Check the splines for wear and damage. |
| 4. |
Check the dynamic damper for cracks, wear and position.
|
| 5. |
Check the driveshaft for cracks and abnormal wear.
|
| Disassembly |
|
| 1. |
Remove the Front Driveshaft.
(Refer to Driveshaft Assembly - "Front Driveshaft") |
| 2. |
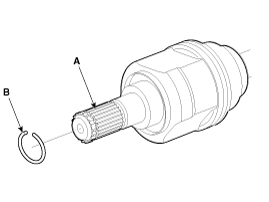
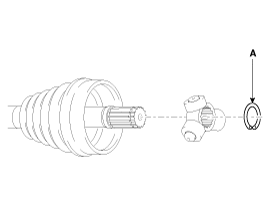
Remove the BJ circlip (B) from the TJ housing (A).
|
| 3. |
Remove both boot bands from the TJ housing.
|

| 4. |
Pull out the boot from the transaxle side joint (TJ). |
| 5. |
While separating joint boot (A) of the transaxle side,wipe the grease in VTJ case (B) and lay them in the correct order.
|
| 6. |
Remove the snap ring (A) from the shaft.
|
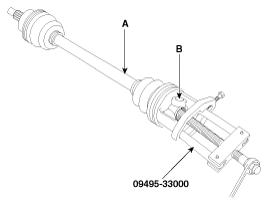
| 7. |
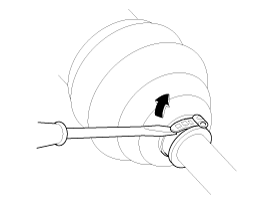
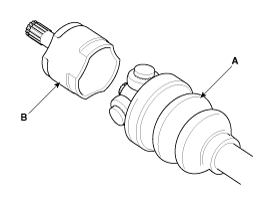
Remove the spider assembly (B) from the driveshaft (A) using the special tool (09495-33000).
|
| 8. |
Clean the spider assembly. |
| 9. |
Remove the TJ boot (A).
|

| Reassembly |
| 1. |
Wrap tape around the driveshaft spline(TJ) to prevent damage to the boot. |
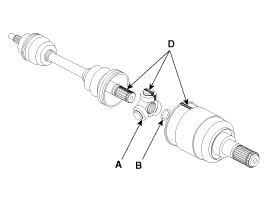
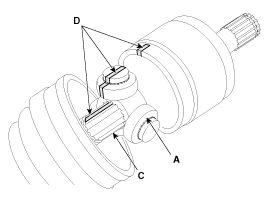
| 2. |
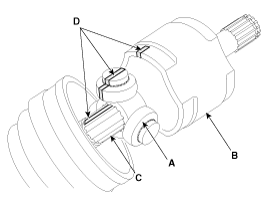
Using the alignment marks (D) made during disassembly as a
guide, install the spider assembly (A) and snap ring (B) on the
driveshaft splines (C).
|
| 3. |
Add grease to the joint boot. |
| 4. |
Install both boot bands. |
| 5. |
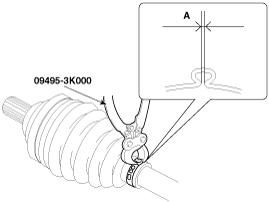
To control the air in the TJ boot, keep the specified distance between the boot bands when they are tightened.
| ||||||||

| 6. |
Using the SST(09495-3K000), secure the TJ boot bands.
|
| 7. |
Install the Front Driveshaft.
(Refer to Driveshaft Assembly - "Front Driveshaft") |
| 8. |
Check the front alignment.
(Refer to Suspension System - "Front Alignment") |
 Front Driveshaft Components and Components Location
Component (1)
1. Driveshaft (RH) 2. Circlip3. Driveshaft (LH)
Component (2)
[LH]
1. BJ assembly 2. BJ circlip 3. BJ boot band 4. BJ boot 5. Shaft6. TJ boot band7. TJ boot8. Spider assemb ...

Other information:
Kia Soul EV (PS EV) 2015-2020 Service Manual: Crash Pad Side Cover Repair procedures
Replacement • Put on gloves to protect your hands. • When prying with a flat-tip screwdriver, wrap it with protective tape, and apply protective tape around the related parts, to prevent damage. • Us ...
Kia Soul EV (PS EV) 2015-2020 Service Manual: Tail Gate Latch Components and Components Location
Component Location 1. Tail gate latch assembly ...
Copyright © www.ksoulev.com 2020-2025
