Kia Soul EV: EV Battery System / High Voltage Battery Handling Guide
Kia Soul EV (PS EV) 2015-2020 Service Manual / EV Battery System / High Voltage Battery Handling Guide
| High voltage battery system inspection guide |
|
| Classification | Inspection process | Inspection results | Measures | |||||||||||||
| Fire outside the high voltage battery mount e.g. fire in engine |
| High voltage battery insulation damaged | Remove the high voltage battery and repair the insulation process/coating. | |||||||||||||
| High voltage battery not damaged | DTC code | If a DTC code occurs, comply with DTC diagnosis guide and repair process. | ||||||||||||||
| No DTC code and battery appears normal | Do
not replace the high voltage battery (if the battery is damaged and
must be disposed of, perform the high voltage battery disposal process). | |||||||||||||||
| Fire in the high voltage battery mount e.g. fire in trunk |
| High voltage battery appears damaged (heat, soot, etc.) | Remove the service disconnect plug and perform the salt water battery disposal process. | |||||||||||||
| High voltage battery insulation damaged | Remove the high voltage battery and repair the coating/insulation. | |||||||||||||||
| High voltage battery not damaged | DTC code | If a DTC code occurs, perform the repair process outlined in the DTC diagnosis guide. | ||||||||||||||
| No DTC code and battery appears normal | Do
not replace the high voltage battery (if the battery is damaged and
must be disposed of, perform the high voltage battery disposal process). | |||||||||||||||
3) Collision
| Classification | Inspection process | Inspection results | Measures | |||||||||||||
| Collision damage to areas other than the high voltage battery mount e.g. front/side collisions |
| High voltage battery insulation damaged | Remove the high voltage battery and repair the coating/insulation. | |||||||||||||
| High voltage battery not damaged | DTC code | If a DTC code occurs, perform the repair process outlined in the DTC diagnosis guide. | ||||||||||||||
| No DTC code and battery appears normal | Do
not replace the high voltage battery (if the battery is damaged and
must be disposed of, perform the high voltage battery disposal process). | |||||||||||||||
| Collisions involving the high voltage battery mount ?Example) Rear-end collision |
| High voltage battery insulation damaged | ? Follow the measures outlined above. ? If the high voltage battery mount is inaccessible due to trunk or door damage, bend or cut the exterior panels without damaging the high voltage system and carry out the inspection and repair process. | |||||||||||||
| High voltage battery not damaged | DTC code | |||||||||||||||
| No DTC code and battery appears normal | ||||||||||||||||
4) Submersion
| Classification | Inspection process | Inspection results | Measures | |||||||||||||
| High voltage battery not submerged |
| High voltage battery insulation damaged | Remove the high voltage battery and repair the coating/insulation. | |||||||||||||
| High voltage battery not damaged | DTC code | If a DTC code occurs, perform the repair process outlined in the DTC diagnosis guide. | ||||||||||||||
| No DTC code and battery appears normal | Do
not replace the high voltage battery (if the battery is damaged and
must be disposed of, perform the high voltage battery disposal process). | |||||||||||||||
| High voltage battery submerged [Regardless of water conditions] |
| Carry out these measures regardless of the inspection results | Remove the high voltage battery and repair the coating/insulation. | |||||||||||||
| Main Fuse Inspection |
|
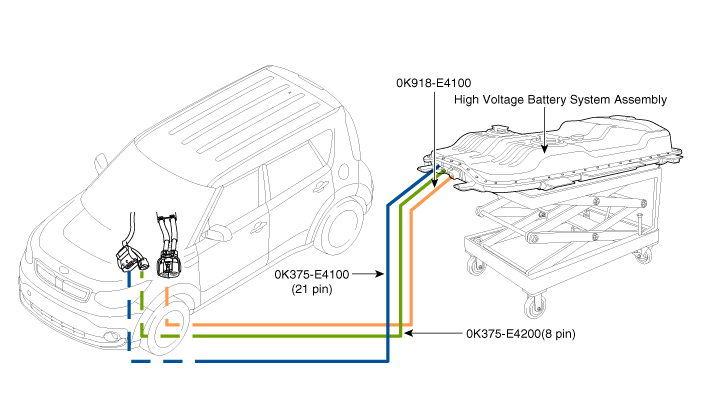
When removing the battery pack assembly to inspect the
battery system, it can be connected to vehicle by using the SST
0K918-E4100, 0K375-E4100, 0K375-E4200. Before installing the battery
system assembly, check if the battery is OK by using the SST. |
| Method 1 |
| 1. |
Remove the safety plug.
(Refer to High Voltage Battery Control System - "Safety Plug") |
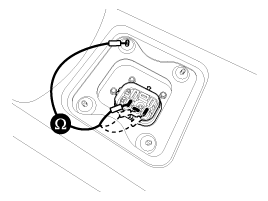
| 2. |
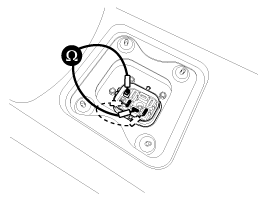
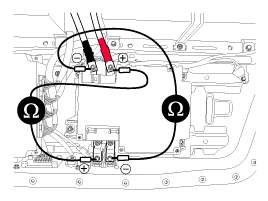
Measure the resistance of safety plug cable which is connected to main fuse.
|
| Method 2 |
| 1. |
Turn the ignition switch OFF and disconnect the auxiliary battery negative (-) terminal. |
| 2. |
Shut off the high voltage.
(Refer to Battery Control System - "High Voltage Shut-off Procedure") |
| 3. |
Remove the high voltage battery upper case.
(Refer to High Voltage Battery System - "Case") |
| 4. |
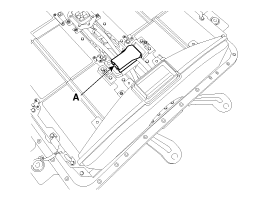
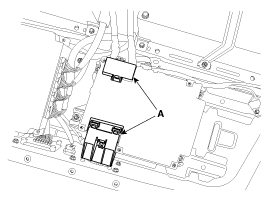
Remove the upper fuse box (A).
|
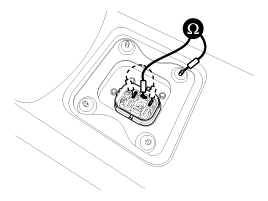
| 5. |
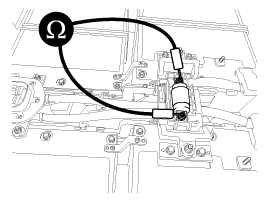
Perform the electrical test of main fuse.
|
| Checking for Welding in the High Voltage Main Relay |
When removing the battery pack assembly to inspect the
battery system, it can be connected to vehicle by using the SST
0K918-E4100, 0K375-E4100, 0K375-E4200. Before installing the battery
system assembly, check if the battery is OK by using the SST. |
In order to safely remove the battery pack assembly, you must
first inspect the high voltage main relay for signs of damage on
welding.
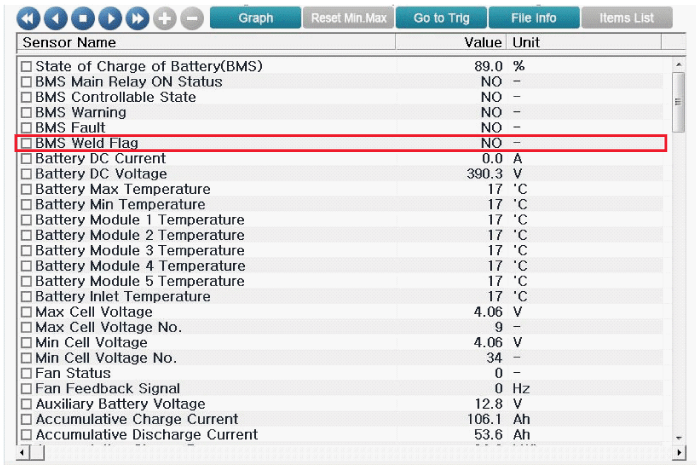
You can use Global Diagnostic System (GDS) service data to detect weld damage in the high voltage main relay.
| 1. |
Connect the GDS to DLC. |
| 2. |
Turn the ignition switch ON. |
| 3. |
Check the BMS weld damage state in the GDS service data.
|
|
| 1. |
Shut off the high voltage.
(Refer to "High voltage Shut-off Procedures”) |
| 2. |
Remove the high voltage battery pack assembly.
(Refer to High Voltage Battery System - "Battery Pack Assembly") |
| 3. |
Remove the upper case.
(Refer to High Voltage Battery System - "Case") |
| 4. |
Remove the protect cover (A) of power relay assembly (PRA).
|
| 5. |
Check for damage on welding in the high voltage main relay.
|
| Insulation Resistance Inspection (With vehicle) |
When removing the battery pack assembly to inspect the
battery system, it can be connected to vehicle by using the SST
0K918-E4100, 0K375-E4100, 0K375-E4200. Before installing the battery
system assembly, check if the battery is OK by using the SST. |
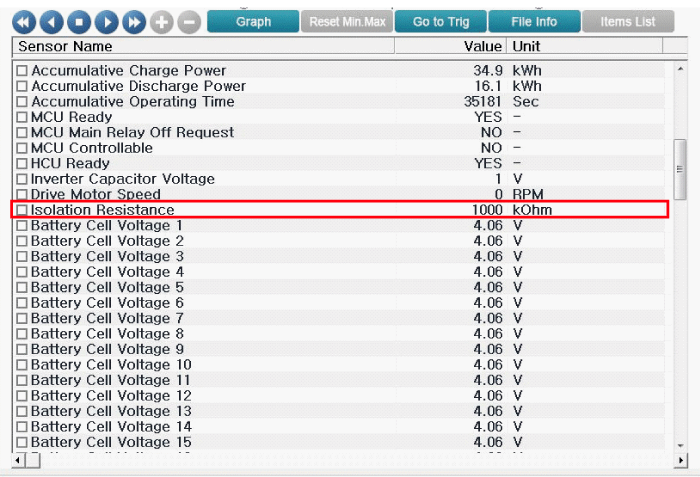
The insulation status between the vehicle and the battery pack assembly can be checked on GDS or by measuring the resistance.

| 1. |
Connect the GDS to DLC. |
| 2. |
Turn the ignition switch ON. |
| 3. |
Inspect the insulation resistance in the GDS service data.
|
|
| 1. |
Shut off the high voltage.
(Refer to Battery Control System - "High Voltage Shout-off Procedure") |
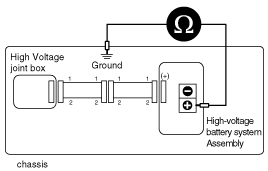
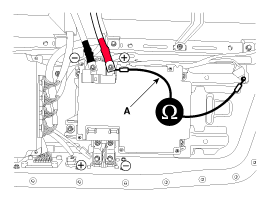
| 2. |
Connect the negative (-) terminal of mega ohm meter (A) to ground of the vehicle.
|
| 3. |
After connecting the positive (+) terminal to positive (+) terminal of the battery, measure the resistance as follows.
|
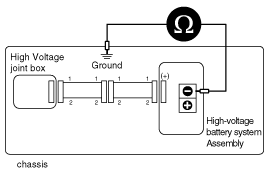
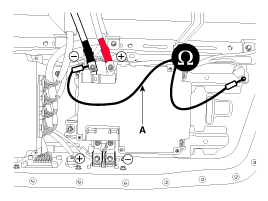
| 4. |
After connecting the positive (+) terminal to negative (-) terminal of the battery, measure the resistance as follows.
|
| Insulation Resistance Inspection (With battery) |
|
| 1. |
Remove the high voltage battery pack assembly.
(Refer to High Voltage Battery System - "Battery Pack Assembly") |
| 2. |
Remove the upper case of high voltage battery pack assembly.
(Refer to High Voltage Battery System - "Case") |
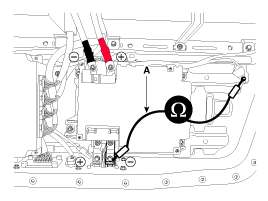
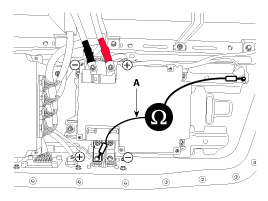
| 3. |
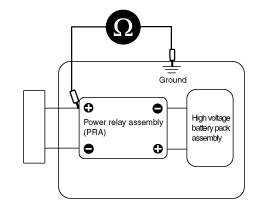
Remove the protect cover (A) of power relay assembly (PRA).
|
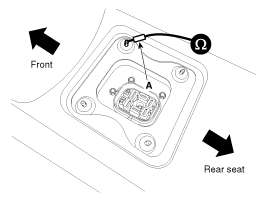
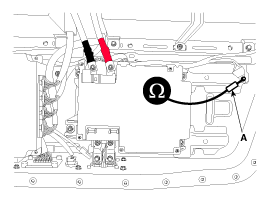
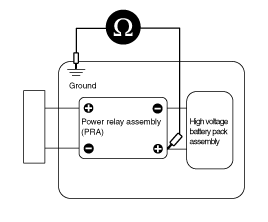
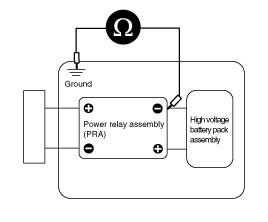
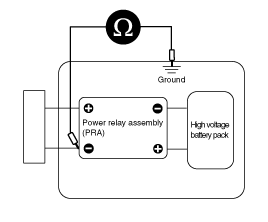
| 4. |
Connect the negative (-) terminal of mega ohm meter to lower case.
|
| 5. |
Connect the positive (+) terminal to high voltage battery (+, -) terminals to measure the resistance.
|
| Handling Guide for Storing, Transporting, and Disposing of High Voltage Battery Systems |
| 1. High voltage battery system handling process |
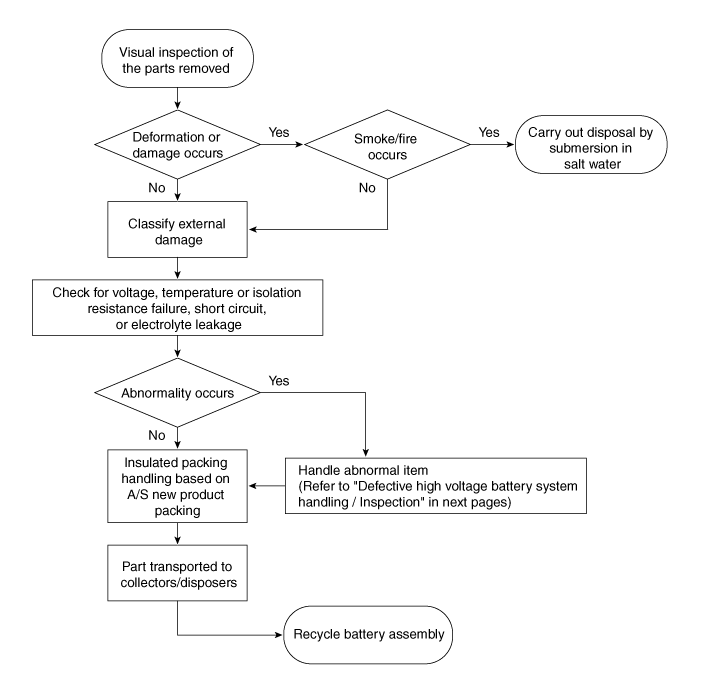
| 2. Defective high voltage battery system handling / Inspection |
| Classification | ||
 High Voltage Shut-off Procedures
High Voltage Shut-off Procedure
Be sure to read and follow the “General Safety Information
and Caution” before doing any work related with the high voltage
syst ...
 Specifications
Specification
High Voltage Shut-off Procedures
? Specification
ItemSpecificationRemarkCapacitor Voltage between the inverter terminalsLess than 30VCheckable by multi tester
High Voltage Ba ...
Other information:
Kia Soul EV (PS EV) 2015-2020 Service Manual: TPMS Sensor Description and Operation
Description Mode of Operation ASIC Mode 1. Factory Mode The factory mode is the mode that allows the TPM sensor to transmit RF Frames and sample LF more often in the HKMC factory. The TPM sensor will send normal RF frames in factory mode. LF sampling will occur every 1 second, to ensu ...
Kia Soul EV (PS EV) 2015-2020 Service Manual: Compressor Oil Repair procedures
Oil Specification 1. The HFC-134a system requires synthetic compressor oil (POE) whereas the R-12 system requires mineral compressor oil. The two oils must never be mixed. 2. Compressor oil (POE) varies according to compressor model. Be sure to use oil specified for the model of compress ...
Copyright © www.ksoulev.com 2020-2025


