Kia Soul EV: Rear Suspension System / Rear Shock Absorber Repair procedures
Kia Soul EV (PS EV) 2015-2020 Service Manual / Suspension System / Rear Suspension System / Rear Shock Absorber Repair procedures
| Replacement |
| 1. |
Loosen the wheel nuts slightly. Raise the vehicle, and make sure it is securely supported. |
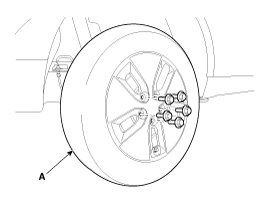
| 2. |
Remove the front wheel and tire (A) from front hub.
|

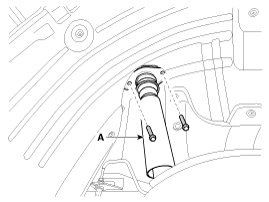
| 3. |
Loosen the rear shock absorber (A) upper mounting bolt.
|
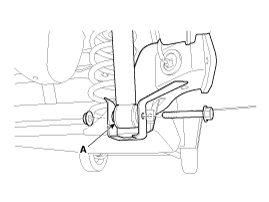
| 4. |
Loosen the bolt and then remove the rear shock absorber (A) from the torsion beam axle.
|
| Inspection |
| 1. |
Check the rubber parts for wear and deterioration. |
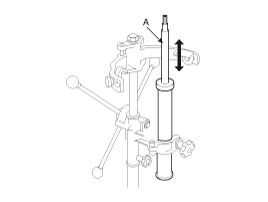
| 2. |
Compress and extend the piston rod (A) and check that there is no abnormal resistance or unusual sound during operation.
|
Disposal
| 1. |
Fully extend the piston rod. |
| 2. |
Drill a hole on the (A) section to remove gas from the cylinder.
|

 Rear Shock Absorber Components and Components Location
Components
1. Shock absorber assembly 2. Dust cover 3. Bump stopper 4. Cup 5. washer6. Insulator assembly 7. Lock nut
...
 Rear Coil Spring Components and Components Location
Components
1. Spring lower pad2. Spring3. Spring upper pad
...
Other information:
Kia Soul EV (PS EV) 2015-2020 Service Manual: Panorama Sunroof Deflector Repair procedures
Replacement 1. Completely open the movable glass using the panorama sunroof switch. 2. Loosen he mounting screws (A) located at the side of the panorama sunroof deflector. • Be careful not to damage the screws. 3. Remove the panorama sunroof d ...
Kia Soul EV (PS EV) 2015-2020 Service Manual: Power Door Mirror Switch Repair procedures
Removal 1. Disconnect the negative (-) battery terminal. 2. Remove the front left door trim. (Refer to Body - "Front Door Trim") 3. Remove the power window switch assembly (A) by loosening the mounting screws (8EA). 4. Remove the power window switch (A) after loosening the mounting ...
Copyright © www.ksoulev.com 2020-2025
